Camera setup
This setup steps needs to be done once before the event.
For the gain, shutter and aperture (iris) settings, note that you need to set the camera to manual mode, otherwise the camera will calculate the “automatic” parameters, so that e.g the brightness of the image will not change.
50/60Hz frequency settings
The camera’s frequency compensation should be set to match the electricity grid frequency in the country. Usually that is 50 Hz except in the Americas, where it is 60 Hz.
To do so:
Press the Menu Button
On the LCD scroll down all the way down to reach the “Others” Menu
Select the 50/60 Sel.
Read the text on the LCD what’s next.
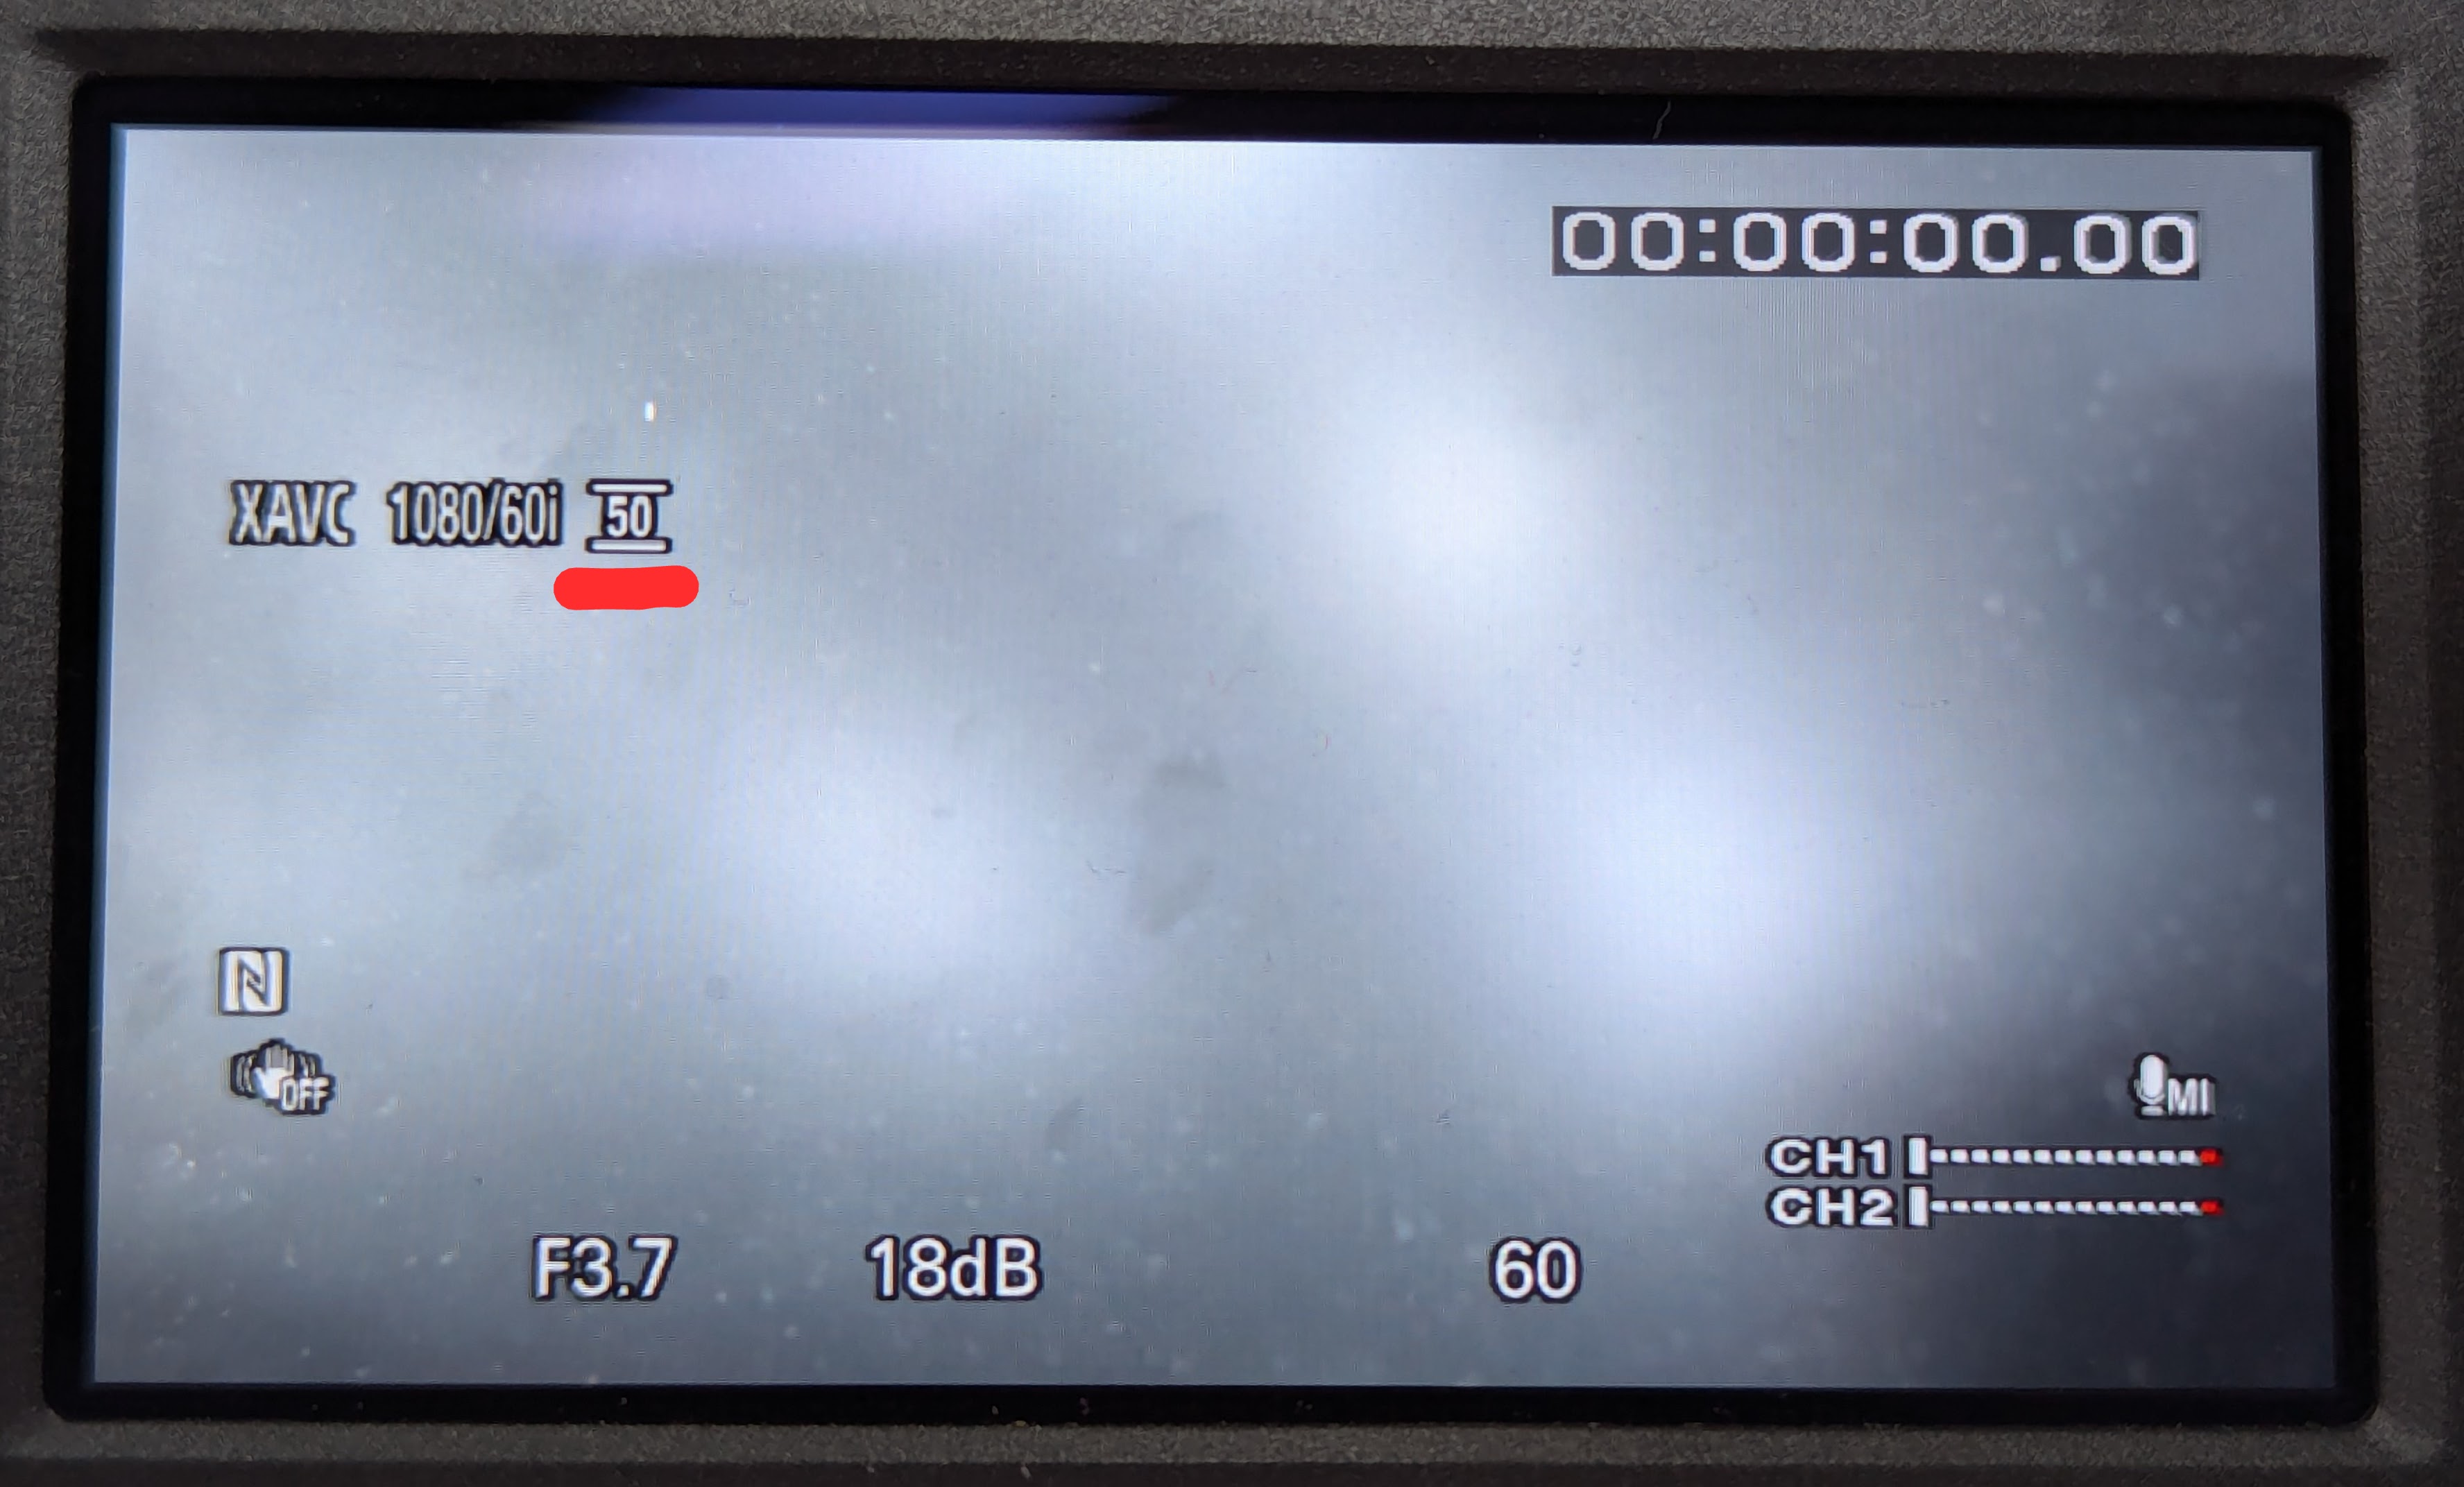
The LCD will show the current setting, the symbol is 50/60 within two lines (on bottom and top).
White balance (WB)
White balance needs to be set to ensure that the colors will look natural in the lighting conditions of the room.
To have the camera learn what the color white looks like in that particular room do:
Press the menu button
Go to camera settings
Select WB Set
Let someone let someone stand where the speaker would normally stand, let them hold a white paper
Zoom in on the paper so that the camera can “learn” what the color white looks like in that particular room
Press the Exec-button to apply.
If the WB Set button is greyed out, you need to set white balance to manual:
Press the WHT BAL button
Select A using the dial
The procedure should be redone if the lighting situation changes significantly, but of course not during a talk.
Once one of the cameras has been white-balanced, the other should be configured to match manually. This is done by:
Press the menu button
Go to camera settings
Select WB Temp Set
Enter the temperature determined by the other camera
Image settings
Both cameras in the room should be in manual mode and configured so that the images from both are consistent in Voctomix. This can be checked by looking at the two previews side-by-side in Voctomix. The camera operators should refrain from changing image settings during a talk; if an emergency situation dictates changes, the video team needs to be informed to check the setup before the next talk.
Shutter settings
Shutter settings set the exposure time in frames per seconds. Likely a setting of 50 will be fine for normal talk situations.
To set it:
Press Shutter Speed,
Use the dial to select the speed you want
Press any other button beside Shutter Speed to store the setting (e.g the Iris button)
To set it to auto:
Press Shutter Speed twice.
Notes
Do not go below 50.
While shutter speed changes the brightness of the picture, the Gain and the Iris options are the better suited to achieve this effect.
Gain
Gain “amplifies” the optical signal retrieved from the sensor of the camera, so it will be able to brighten up / darken the picture.
Note that pushing gain too much up will increase the noise level of the recording, so it should be tuned in combination with the aperture setting.
To do so:
Press the gain button
Adjust the gain with the dial.
Press another button beside the gain one to store the value
To set it to auto:
Press the gain button twice.
Iris (aperture)
The aperture is size of the opening in the lens. A bigger aperture by number means a smaller opening. The current aperture is indicated on the lower left area in the LCD, e.g. F5.2.
The lower your aperture is, the more light will hit the sensor, so the picture will become brighter. However, but you still want to have it as high as possible, as a low aperture size has also a wide depth of field, so that as much as possible in the picture will in focus (https://en.wikipedia.org/wiki/Depth_of_field). This also avoids frequent re-focusing.
To do so:
Press the iris button
Adjust the aperture with the dial.
Press another button beside the gain one to store the value
To set it to auto:
Press the iris button twice.